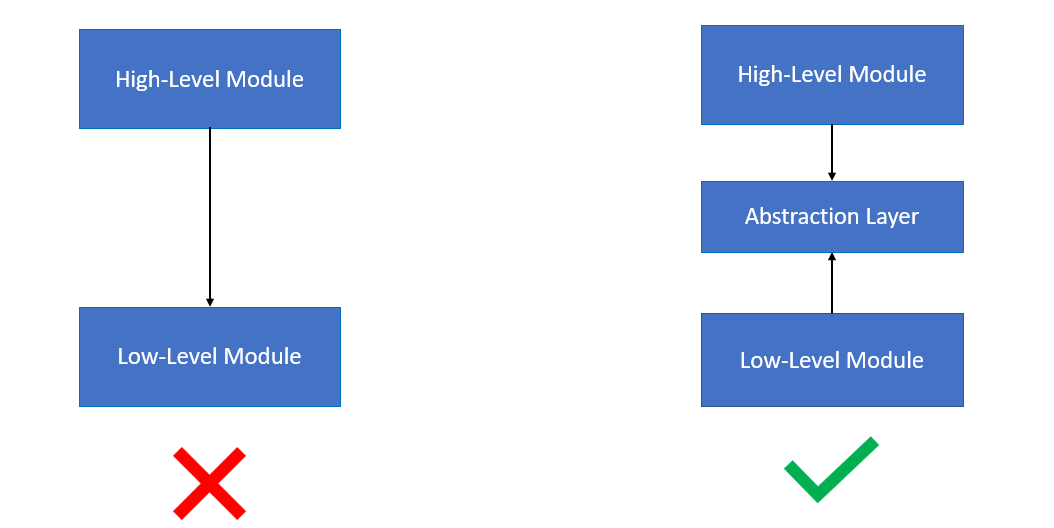
The Dependency Inversion Principle (DIP) is one of the five SOLID principles, and it plays an essential role in achieving maintainable and flexible code. It can be applied to frontend development, particularly when using technologies like React and Redux.
Dependency Inversion emphasizes that higher-level modules should not depend on lower-level modules but instead depend on abstractions. This decoupling encourages a more modular code structure, making it easier to modify, test, and maintain.
How it Translates to React and Redux
In the context of React and Redux, the Dependency Inversion Principle can be applied by creating an abstract interface (API) for accessing and requesting data. By hiding the implementation details of Redux, the components become more adaptable, and changes in the state management implementation have minimal effects on the rest of the application.
Using React Hooks to Define the API
React Hooks enable you to encapsulate complex logic and manage stateful logic. You can create a custom hook that serves as an abstract API, hiding the Redux details and providing a clean interface for components to interact with the state.
TypeScript Example
Let's create a custom hook to access and request data, hiding the Redux implementation.
- Define Types: We'll start by defining the types we'll be using.
type UserData = {
  id: string;
  name: string;
  email: string;
};

type UserState = {
  loading: boolean;
  user: UserData | null;
  error: string | null;
};
- Create Custom Hook: We'll create a custom hook that interacts with Redux but provides a simple interface for the components.
import { useSelector, useDispatch } from "react-redux";
import { fetchUser } from "./userActions"; // Assume this is an action creator

export const useUserApi = () => {
  const dispatch = useDispatch();
  const userState = useSelector((state: any) => state.user) as UserState;

  const getUser = (userId: string) => {
    dispatch(fetchUser(userId));
  };

  return {
    loading: userState.loading,
    user: userState.user,
    error: userState.error,
    getUser,
  };
};
- Using the Custom Hook in a Component: Components can now interact with the user data through the custom hook, free from the details of Redux.
import React from "react";
import { useUserApi } from "./useUserApi";

const UserProfile = ({ userId }: { userId: string }) => {
  const { loading, user, getUser } = useUserApi();

  React.useEffect(() => {
    getUser(userId);
  }, [userId, getUser]);

  if (loading) return <div>Loading...</div>;
  if (!user) return <div>No user found</div>;

  return (
    <div>
      <h1>{user.name}</h1>
      <p>{user.email}</p>
    </div>
  );
};
This approach ensures that the components depend only on the abstract API provided by the custom hook, conforming to the Dependency Inversion Principle. It also promotes maintainability and makes it easier to replace or change the state management in the future.
Extra, the reducer
Given the previous defined UserState type:
type UserState = {
  loading: boolean;
  user: UserData | null;
  error: string | null;
};
We can define the action types:
type UserAction =
  | { type: "FETCH_USER_REQUEST" }
  | { type: "FETCH_USER_SUCCESS"; payload: UserData }
  | { type: "FETCH_USER_FAILURE"; payload: string };
Now, we'll create the reducer using these action types:
const initialState: UserState = {
  loading: false,
  user: null,
  error: null,
};

const userReducer = (
  state: UserState = initialState,
  action: UserAction
): UserState => {
  switch (action.type) {
    case "FETCH_USER_REQUEST":
      return {
        ...state,
        loading: true,
        error: null,
      };
    case "FETCH_USER_SUCCESS":
      return {
        ...state,
        loading: false,
        user: action.payload,
        error: null,
      };
    case "FETCH_USER_FAILURE":
      return {
        ...state,
        loading: false,
        user: null,
        error: action.payload,
      };
    default:
      return state;
  }
};

export default userReducer;
The userReducer is handling three types of actions: initiating the user fetch request, handling a successful fetch, and handling a failure. The state is updated accordingly, depending on the action received.
You would typically combine this reducer with others using combineReducers when setting up the Redux store. Make sure to align the action creators, like fetchUser, with the actions handled by the reducer.
